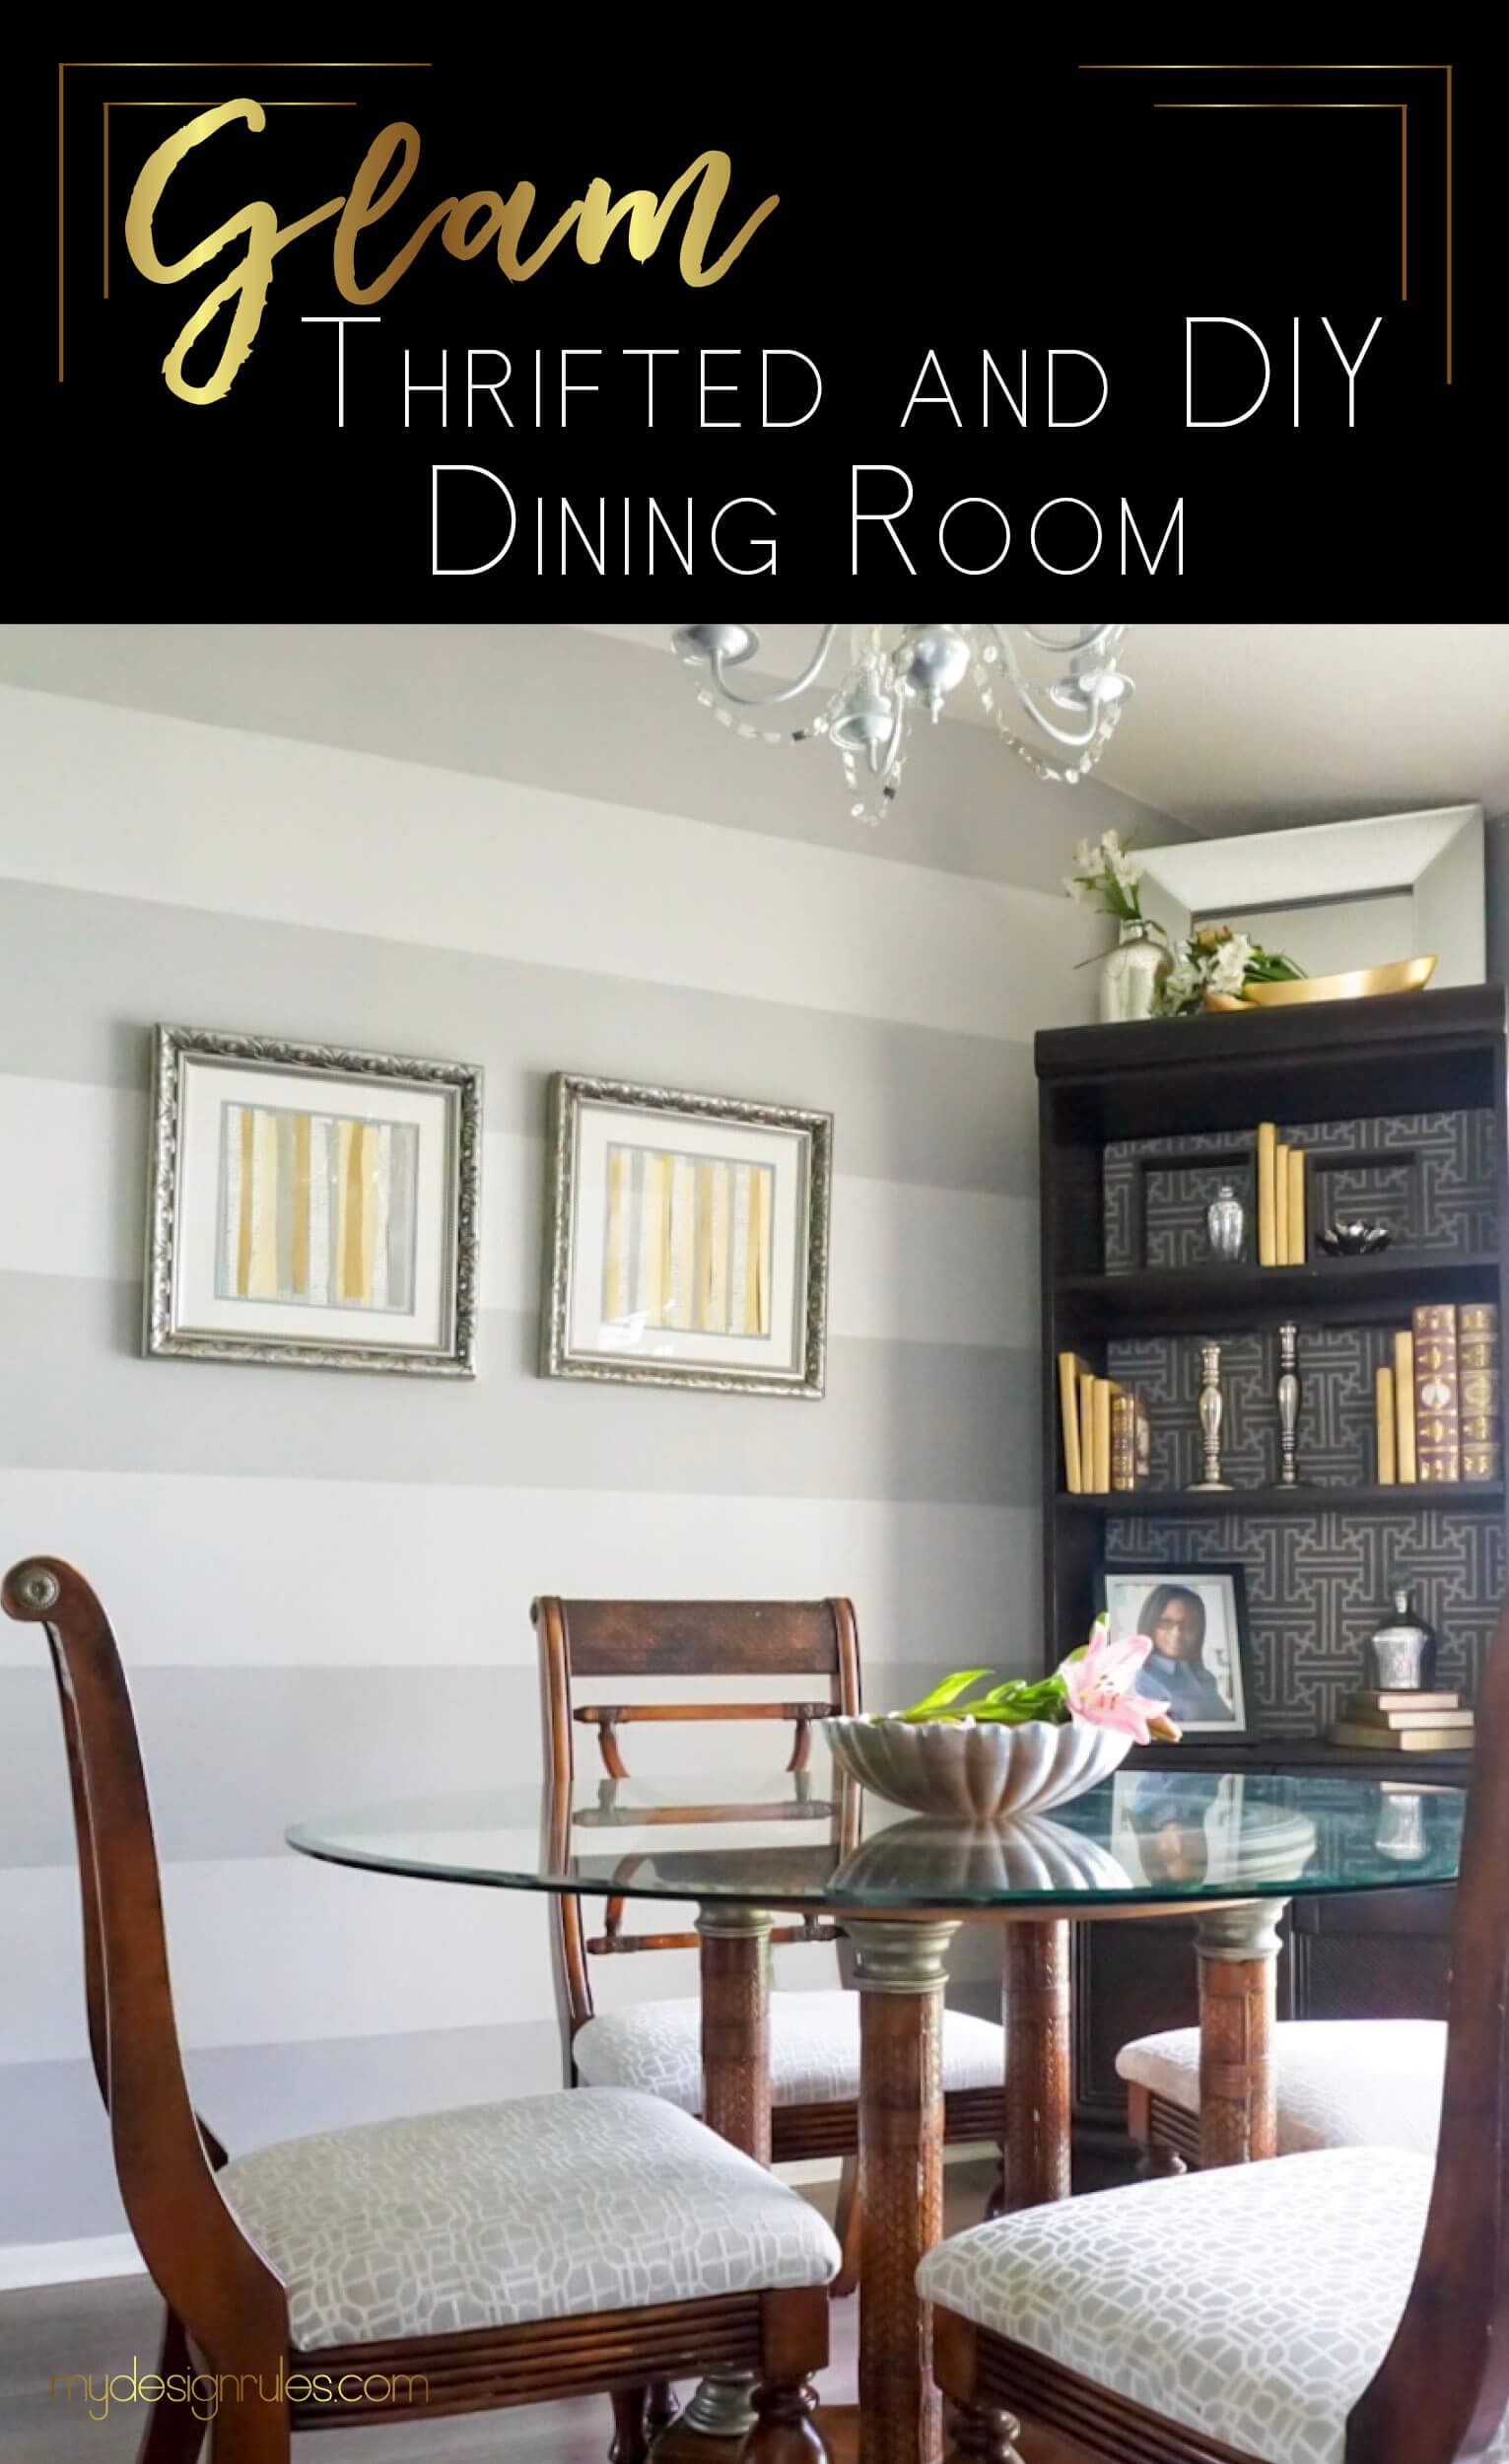

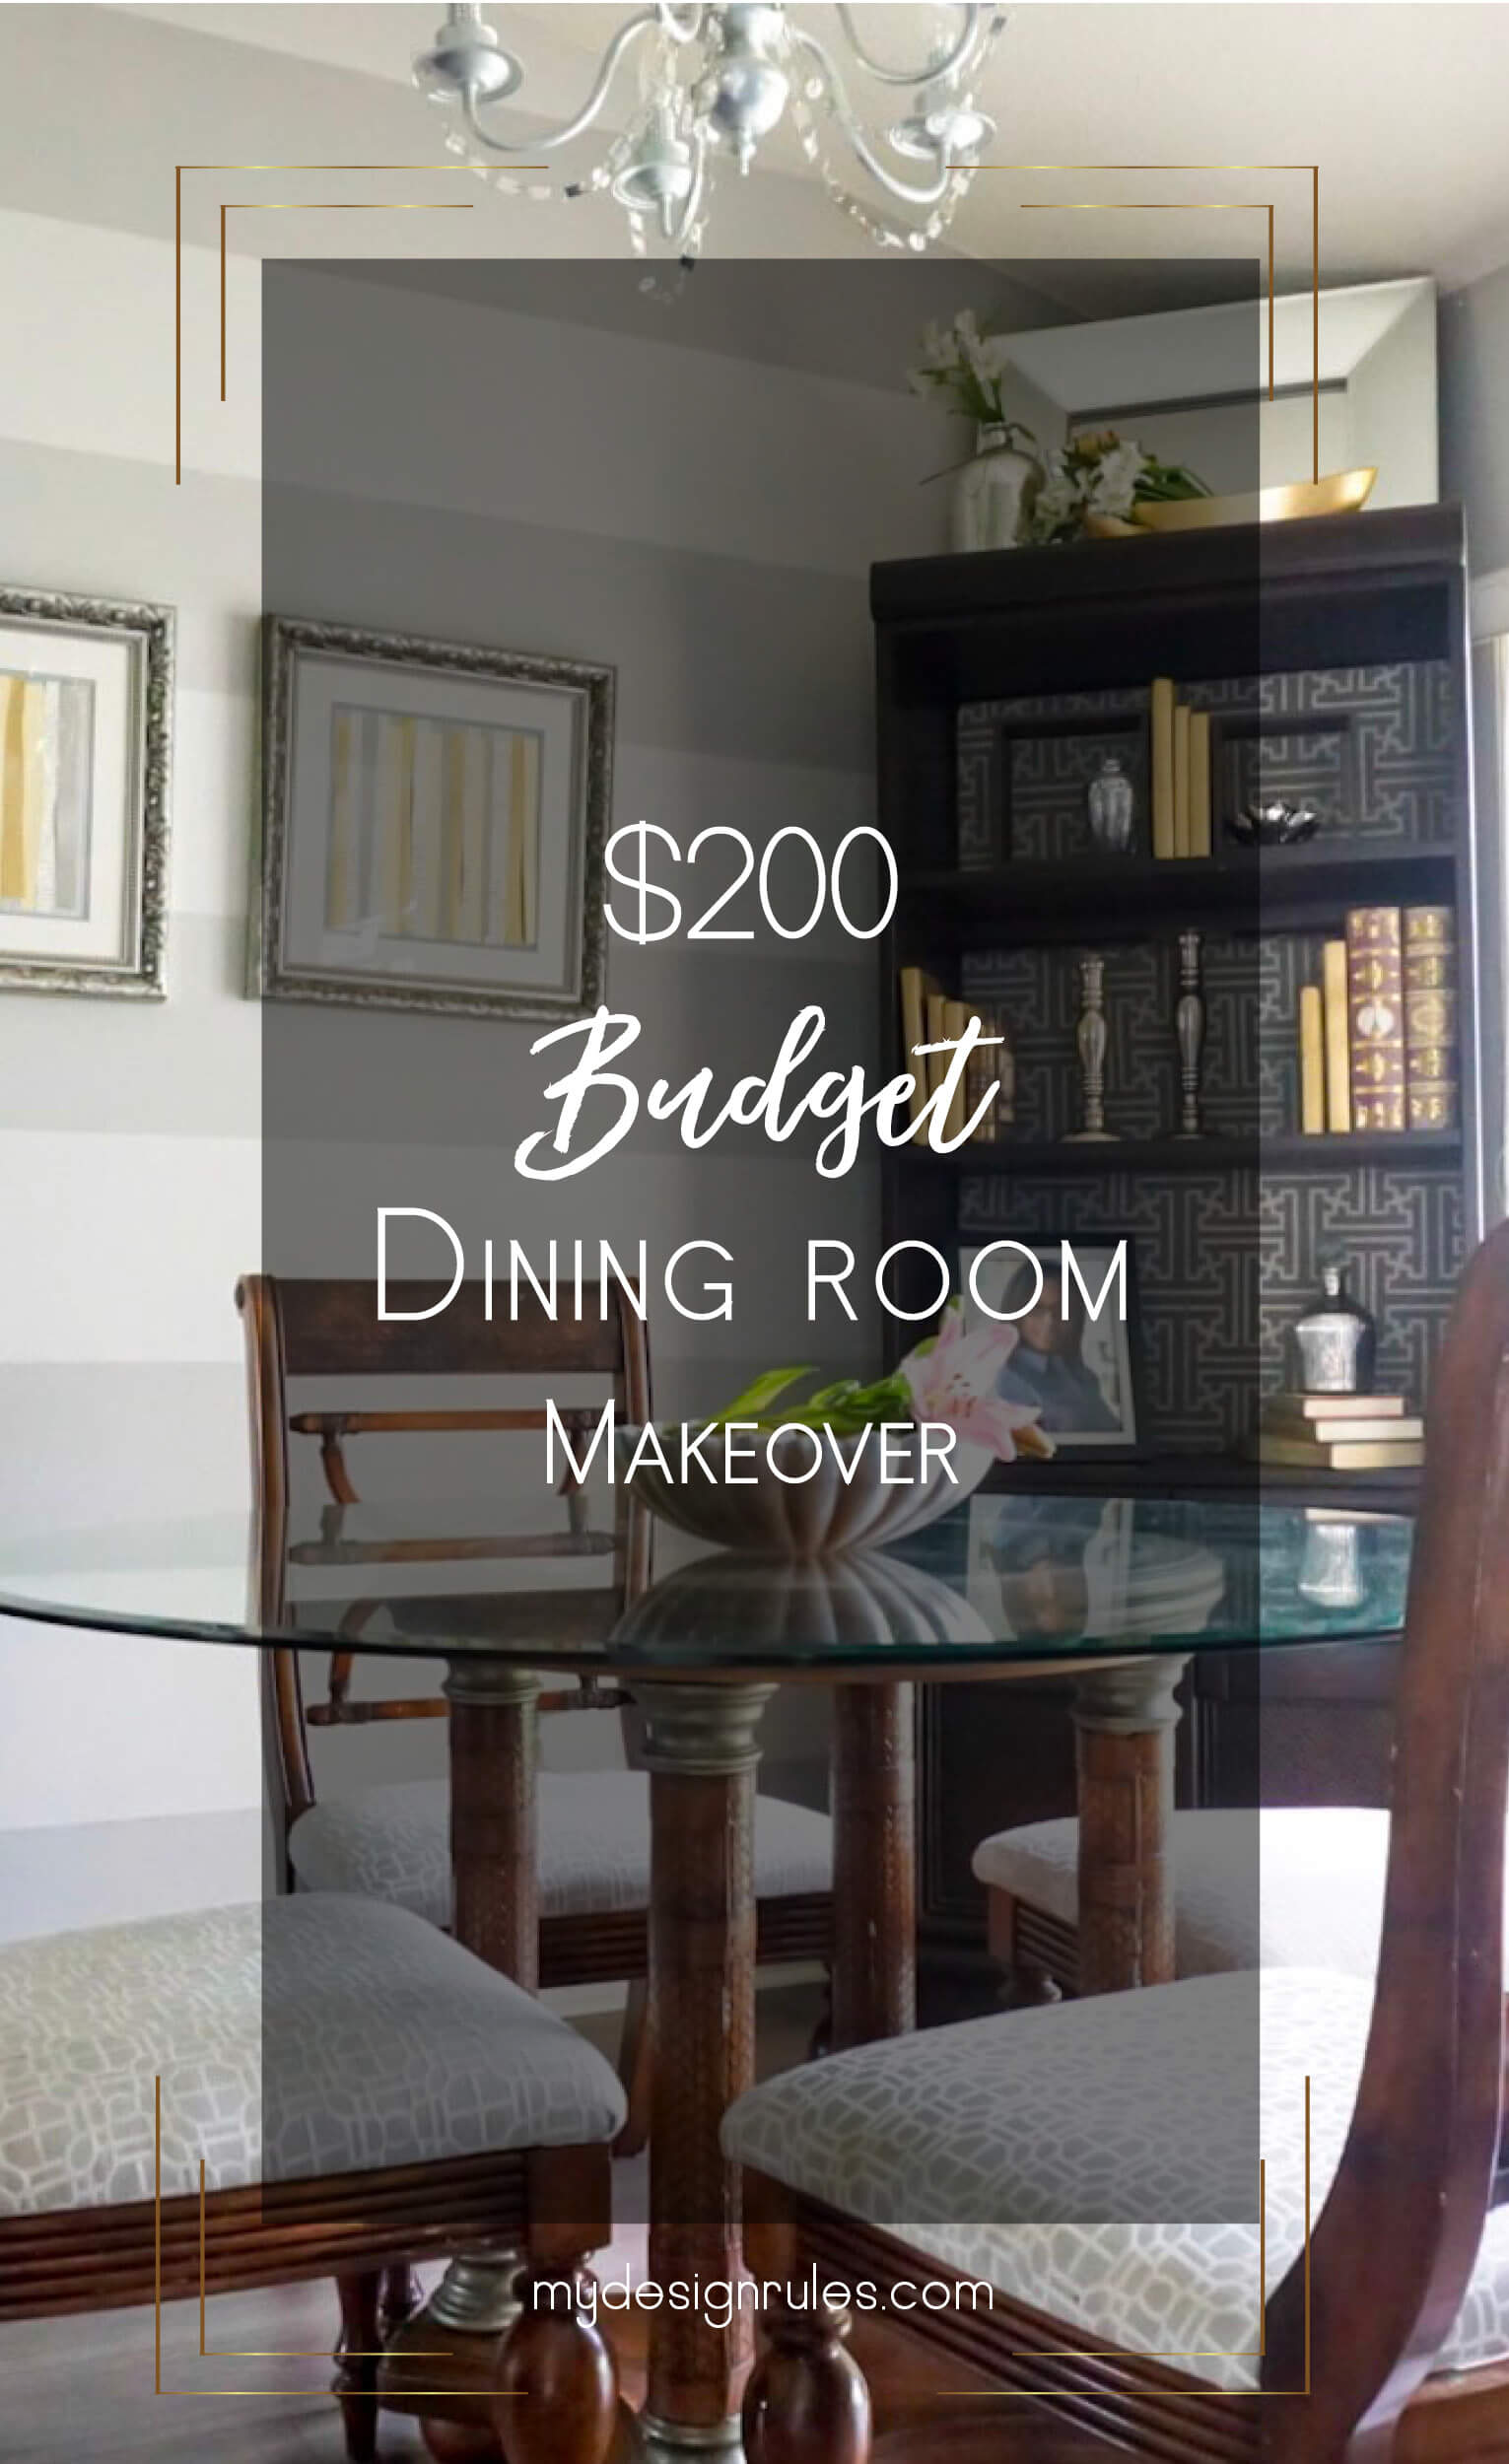
You, my friend, can give your dining room a makeover on a budget. My dining room is proof that you can put together a fabulous room with a little sweat equity and very little cash. Everything in my dining room got a facelift but nothing costs more than $25. In fact, this entire overhaul came in under $200. Honestly, when I calculated it, I could only see $150, but I’ll give myself a little wiggle room in case I forgot something.
This post is pretty picture heavy…just warning you.
This post contains affiliate links. If you make a purchase after clicking on a link, I make a small commission at no cost to you. Read my full disclosure here.
For Starters
I’m pretty ashamed to say that I did not have a plan when I started this room. Like I always say. Don’t be like me. Start your plan here. Now that I work with a plan, things come together wayyy faster.
Even though I didn’t have a roadmap, I knew I wanted stripes on the wall. I figured the sloped architecture and vaulted ceiling would play nicely with the stripes. My husband had already painted the whole house as a birthday gift to me. (That’s the kinda thing I ask for because diamonds aren’t in the budget.) We chose Behr Natural Gray based on an oops paint color we used and liked in the bathroom. I mixed the Natural Gray with some white I had on hand to make the lighter color. I thought it was frugal and genius at the time, now I know it was a rookie mistake. If something happens to one of those light stripes, I can’t run to the paint store to buy more paint. I’d have to start all over. Just terrible.
On to the Chairs…
The fabric chairs lived through my son’s baby and toddler stage, but just barely. Nuf said.
The wood had a weird coating on it that was dinged up and looked worn, but the chairs are well made. I decided to give them a touch-up with General Finishes Gel Stain in Java. The gel took a while to dry on these. A few days later, I purchased two yards of gorgeous dove gray fabric and borrowed a friend’s staple gun. I used a drill to remove the seats and in less than two hours birthed some pretty spiffy chairs.

Easy Bookcase Makeover
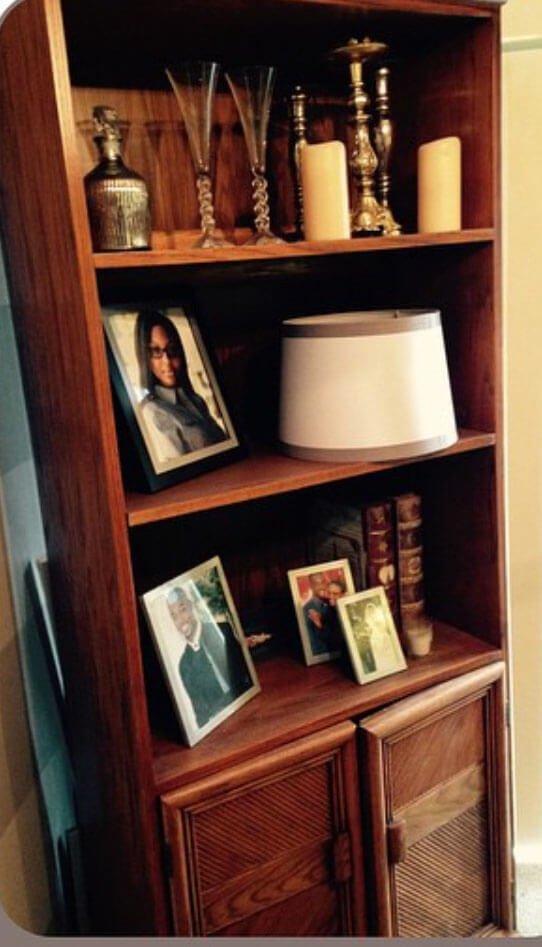
Here’s a before of the beast. It wasn’t styled, just a bunch of random stuff on it while I was cleaning.
The chairs were the guinea pig project for the bookcase. I inherited the orange beast and its cousin from a co-worker who wanted to send them to the dump. They originally added bulk to my bare home when all we owned was a bachelor-pad black leather couch. Now that I wanted an adult home, they just had to go. One thing kept them around–they were solid wood. Who dumps solid wood? Two coats of General Finishes Gel Stain in Java. (the price has gone up on the stain, I bought it for $20) and two coats of Polycrylic (rescued this little gem from banishment. And isn’t she lovely (in my Stevie Wonder voice). I eventually sold the other one.
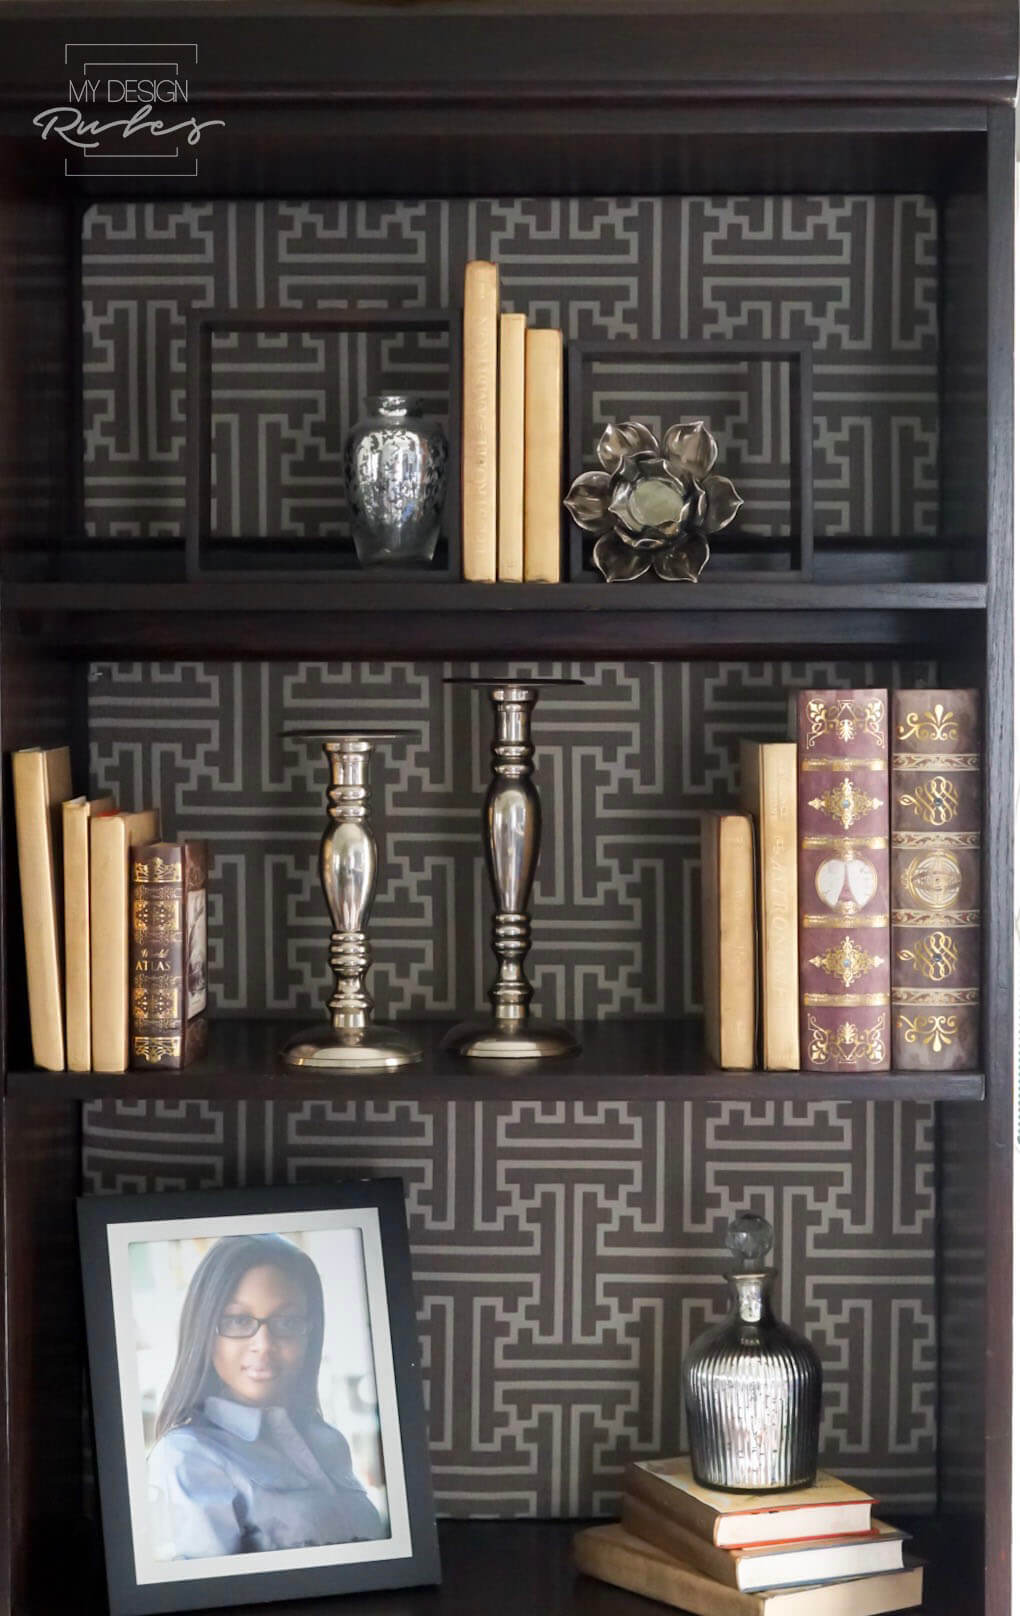
The splurge for this room was the fabric. ($25/yard on sale and with a coupon; I bought one yard) to give the bookcase a little more life. Texture is my jam and both the fabric on the chairs and the bookcase have lots of texture.
I shopped my home to style the bookcase. The books are from Dollar Tree, originally used as table numbers for a friend’s wedding. The coordinator working with me spray painted them gold. The large gold and brown books and candle holders are leftovers from the same wedding… Though I didn’t pay for any of that, the items ARE included in the makeover costs. Everything shown is either thrifted or clearance finds. Nothing on the bookcase cost more than $5. Yes, 5 including that HUGE beautiful mirror at the top. I found it on clearance at Burlington Coat Factory for… wait for it…$2.97. It has a crack on the bottom that no one will ever see. SCORE!

Lighting Makeover
I told you about the chandelier makeover here. I basically did this makeover without buying any supplies and it only took me an hour. This is a very easy project that anyone can do!

Easy DIY Art
Last up is my wall art. I. Love. This. Art. I picked up the frames at the thrift store. The pair cost $14.99. They originally held beautiful pink rose paintings that we used for décor at my sister’s wedding. I spent $3 on scrapbook paper, cut them into strips and glued them together for fantastic textural art. Easiest art project EVA! People always ask me if the writing is from my prayer journal. If only I was that brilliant. No, it’s scrapbook paper too.
*Notice from the chair makeover photo that we got rid of the builder beige carpet…but I didn’t include that in this budget because we did the entire house at once several months later.

The practical takeaway from gawking at my dining room makeover? You can do this too!
Here are the steps to guide you.
- Start with a plan. Learn the basics of decorating with me in the School’s in Session Series.
- Repurpose or Thrift large items. You don’t need all new stuff to makeover your home. Use what you have, search thrift stores or shop Craigslist. You can find some amazing deals and even free stuff on Offer Up and Facebook groups.
- Do Smart DIY projects. Now you may say you’re not crafty, but trust me, if you take your time, you can do amazing things. Get a few tutorials and go to town. The worst you can do is mess up a piece you didn’t like in the first place. And remember it’s okay to fail!
I enjoy showing you my projects and home, but I’m even giddier when I can help you with yours. What are you working on? and how can I help?


Joni says
I am LOVING that bookshelf!!! The whole room is gorgeous.
Kenyatta Harris says
Thanks Joni, that bookcase looked sooo dated before the makeover. I love it now.
Emy says
Your bookcase is absolutely stunning! Love how this room turned out!!
Anne says
Love your makeover! I’m looking forward to revamp my bedroom!
Kenyatta Harris says
Thanks. Can’t wait to see what you do! Send me some pics when you’re done.